Right after the Sock Summit I noticed on Ravelry a workshop with Judith MacKenzie McCuin, master weaver, spinner and dyer, as well as all around interesting person. This workshop was to be in the Hood River Valley, about 2.5 hours from us. I thought, boy that would be fascinating, but I can't get away again. On Monday I finally asked Mark if it would be okay and with his light schedule it worked fine. Chloe was gone for a week to stay with a friend and it would just be the boys at home. I decided to go for it!
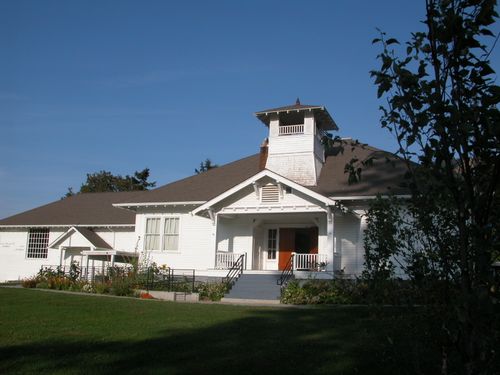
On Tuesday I got away in the early afternoon and arrived just as they were winding down the first day of the workshop. I got a little bit of fiber to start spinning that evening to catch up a little (nearly impossible as Judith goes through so much each day). I did however have 3 glorious days learning with a master in the old schoolhouse above, now the Mt. Hood Town Hall. Come on in and see the explosion of color!
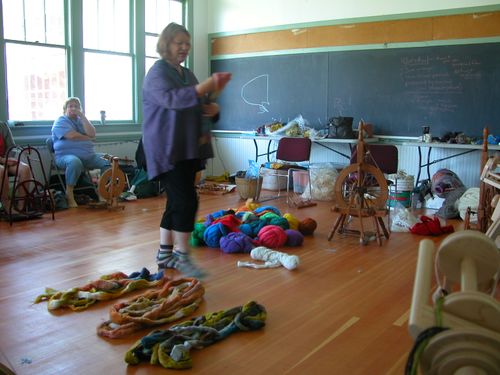
Notice how relatively clear the floor is on the second day, by the last day, it was covered with all sorts of fiber! Here Judith is talking about ways to spin hand dyed roving.

This workshop was incredibly affordable at $275. For our $40 materials fee we got to choose all sorts of colors to make various sorts of spun yarn, plus small amounts of more precious fibers like bison, cashmere, Optim, silk and Suri Alpaca. We also got a bunch of naturally colored fibers and yarns for dyeing. We were also encouraged to bring fiber or garments from home to dye. These next few photos are some of the stuff I brought home.

Above we have Mountain Goat (brought in by one of the participants), various kinds of cashmere, silk and bison.
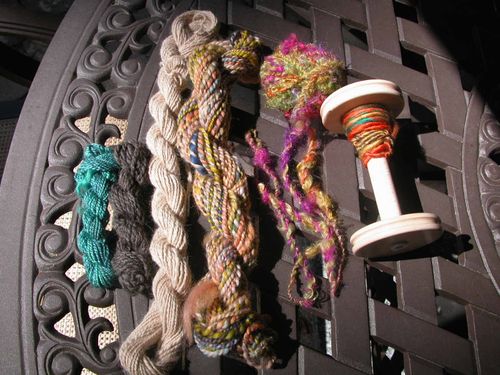
Spun up we have Optim (stretched Merino), alpaca, hand dyed roving, boucle (!), and a merino/silk singles. Spinning the boucle is wild, it's mohair spun over a rayon core. I'm not sure I'd want to do that on a regular basis, but at least I know how it's done.

This is my start on the gradations yarn similar to the yarn at the forefront of the third photo down. You make singles in each color and then 3 ply them to make a gradation from one to the next.

Above is my marled singles in progress. This technique is a really fun way to combine solid colors of top. When it's plied it should be a nice sock yarn.

We got to use Judith's big drum carder which is like a meditative experience. She had big bags of leftover rovings and bits of "ugly" stuff. You just gather a bunch of stuff and add it to the drum carder a little bit at a time. What you get is a mystery batt. Mine were mostly merino with bits of mohair and silk. You can see the drum carder at work below. I'll ply these two together and see what I get.

Now, down to the dye room!

We spent one day using Mother MacKenzie's Miracle Dyes in all sorts of interesting ways I wouldn't have thought possible. These dyes were developed by Judith so she knows them inside and out. One of the great things about a class with Judith is the tangents she can go off on the history and science of whatever she talks about. She's the sort of person that you'd want at your dinner table any old time because you know you'd always have an interesting conversation.
For instance I wouldn't have thought it possible to dye a rainbow in a pot. I thought it would turn into a muddy mess, but look what came out! We got some gorgeous mohair locks on the left and a pile of wool on the right.
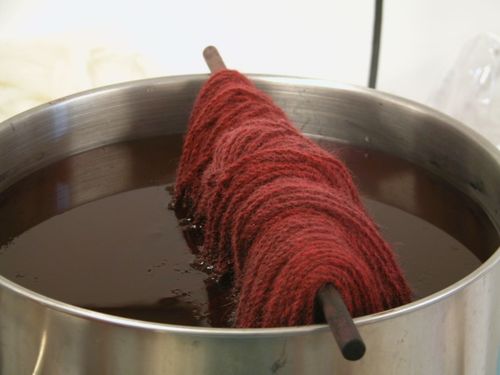
We dyed some skeins with the dip method. I think this is the grey Rambouillet wool that was dyed in the Worker Red. Judith showed us how to mix up a 1% solution of dye for these methods.
Here's another thing that was new to me. Judith showed us that you can dye yarn cakes like this with the dye powder! The cakes are placed tightly in the water bath with vinegar and the dye powder applied at the end of a wooden spoon- just stuffed down in wherever you want to get the color. You do get some surprises this way!

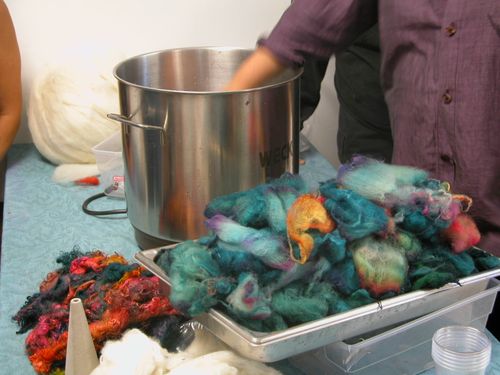
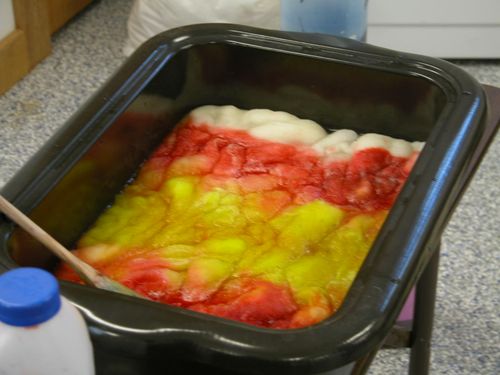
We also got a lesson in dyeing roving in a pan. For all these methods the fiber is heat set, either in the pot or in a steamer. It would be pretty easy to duplicate most of these methods at home with a crock pot. Or, where we live, you could put that tray in a black plastic garbage bag out in the yard on a hot, sunny day and heat set it that way. I learned a lot about how the "prime"colors of magenta, yellow and cyan create other colors. Judith's dyes come in only 9 colors, but you can create any color you want with them. We also learned how dyes act diffferently from pigments because they are translucent.
We did some hand painting on a fingering weight wool/silk blend.

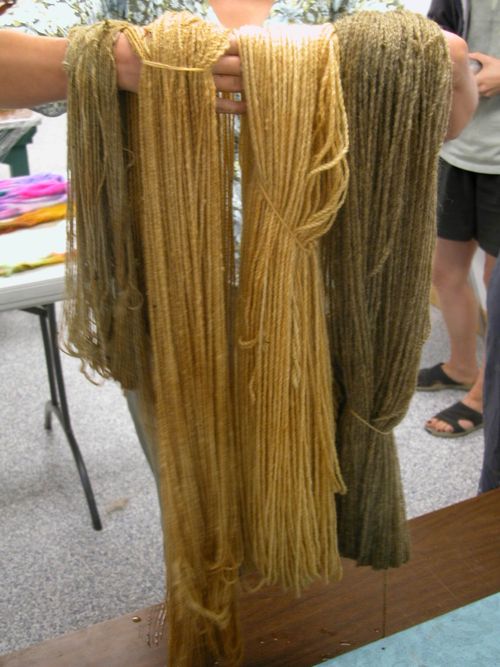
The last day was for natual dyeing and this was the most fascinating to me of all! I had a skein of Lincoln wool that I got at the Fiber Market Day in March and decided to use it for the natural dyes. First, the whole skein was dyed in a lichen bath. I found this to be totally amazing! All you need is lichen and water. No mordants or other chemicals needed. You just put it all in with wool and simmer for a really long time- 16 hours. Ours was done overnight. The skeins below were all dyed in lichen, and I think mine is the second from left. On the right are two Rambouillet skeins (one natual cream and the other natual grey to start). I found her explanation of how the lichen dye works to be incredibly fascinating from a scientific viewpoint. Basically, what you end up with is not wool. It's protein structure has been changed so drastically that if you gave a sample to a lab they wouldn't identify it as wool!
Next, Judith started a cochineal pot and an indigo pot. She suggested that I separate my lichen dyed Lincoln skein into thirds and dye one in cochineal and one in indigo. My skein ended up horribly tangled and by the time I was done I had 4 skeins. So we did one in the cochineal, one as a quick dip in the indigo and the last one as a longer dip in the indigo.

Limes were added to the cochineal to get a stronger pink color.

These are some of mine, two hand painted skeins on the left and the cochineal over lichen on the right.
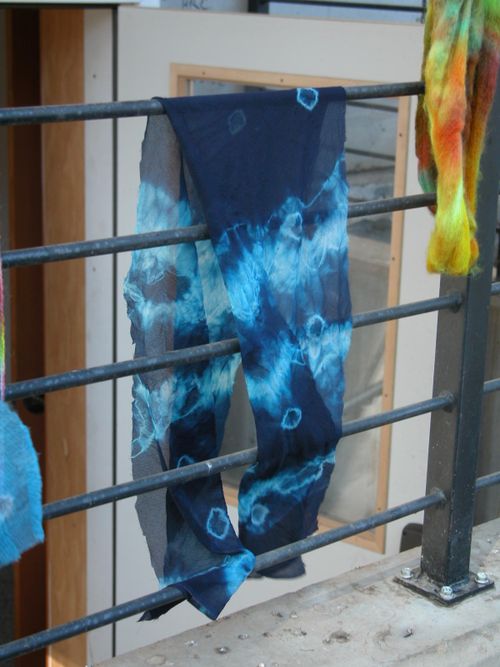
We also got to try some shibori tie dye on silk scarves. This one spent a long time in the indigo pot.

Here you can see the cochineal over lichen on the the left and the straight lichen on the right.

These are my indigo skeins. From the top- indigo over lichen for a long time in the indigo pot, indigo over lichen with a quick dip in the indigo pot, naturally brown merino wool overdyed with indigo, and grey Rambouillet wool overdyed with indigo. I just love the denim color of the last one.

These are all my lichen skeins together. Don't they harmonize well?

A very colorful drying station!

This is what I brought home. You've already seen most of these. The two orange skeins are madder dyed cream Rambouillet. On the far right is an skein of the cream Rambouillet dyed with lichen and indigo. On the bottom right are two of the yarn cakes that were dyed in the pan with powder. These are singles and will need to be plied on themselves or with each other. Not sure which yet! On the bottom left are the mohair wool locks.
Judith's workshop was amazing. I would recommend her to anyone interested in these crafts. She is full of information and good stories and keeps you busy the whole time. If anything I would have liked a few more days. Of course home and family call and now I'm getting back to regular life. I still have more quilt show photos though so stay tuned for that!